Philosophy about component testing
Philosophy of testing
Before introducing the way you can test your front-end application, we need to share the same definitions.
Types of tests
Component-test-utils assumes these approximative definitions well-fitted for component testing:
- Unit Test: Test that stay in memory. (No access to: HTTP, File System, ...)
- Integration test: Test that can access to other things than memory (Network, I/O).
- End to End test: It's basically an integration test with a special rule. No Mock or Stub allowed.
You can do both unit and integration test with component test-utils. The only test type you cannot do is end-to-end testing because component-test-utils is basically a mock of your favorite framework.
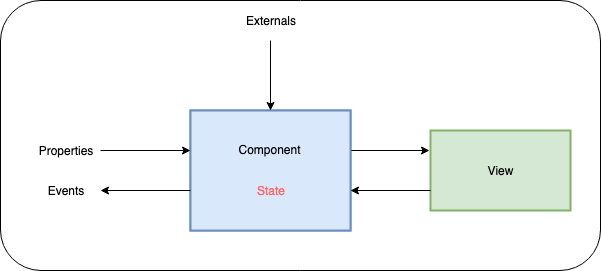
Component take props as input
No matter the JavaScript framework (Vanilla, Vue.js, Angular, React, ...) you use, they share some common vision of what a component should be.
A component is a custom HTML element that produces a view (aka. a piece of others Component and HTML elements).
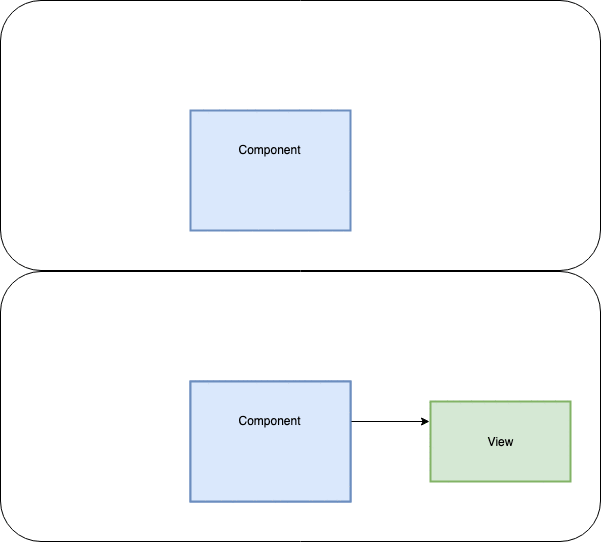
This component can receive parameters just like a function. Usually those parameters are called properties or props.
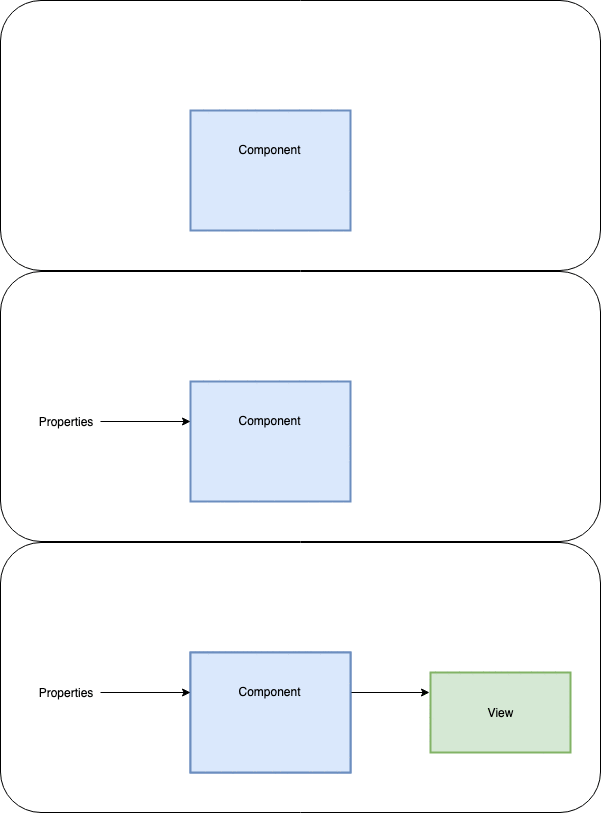
Those props can produce a different view according to each props value.
As the render only depends on the props, no matter the framework you use, the easiest testing strategy is to write tests to assert the rendered view according to the different props value.
This can easily be achieved with component-test-utils. For example, if you consider testing a “like” button:
describe('like button component', () => {
  it('should render a button with "1 like" when the props `nbLikes` is set to 1', () => {
    const component = shallow(Component, {props: {nbLikes: 1}});

    expect(component.html()).toContain('1 like');
  });

  it('should render a button with "2 likes" when the props `nbLikes` is set to 2', () => {
    const component = shallow(Component, {props: {nbLikes: 2}});

    expect(component.html()).toContain('2 likes');
  });
});
Statefull component
Unfortunately, components can sometimes be a bit more complex. For example when they have their own state. Considering the previous example, imagine the like button has different styles depending on whether or not the user have liked the related content.
Because component-test-utils considers each component as a black box, you cannot modify or access their internal state.
Instead, you have to trigger an internal event from the view itself !
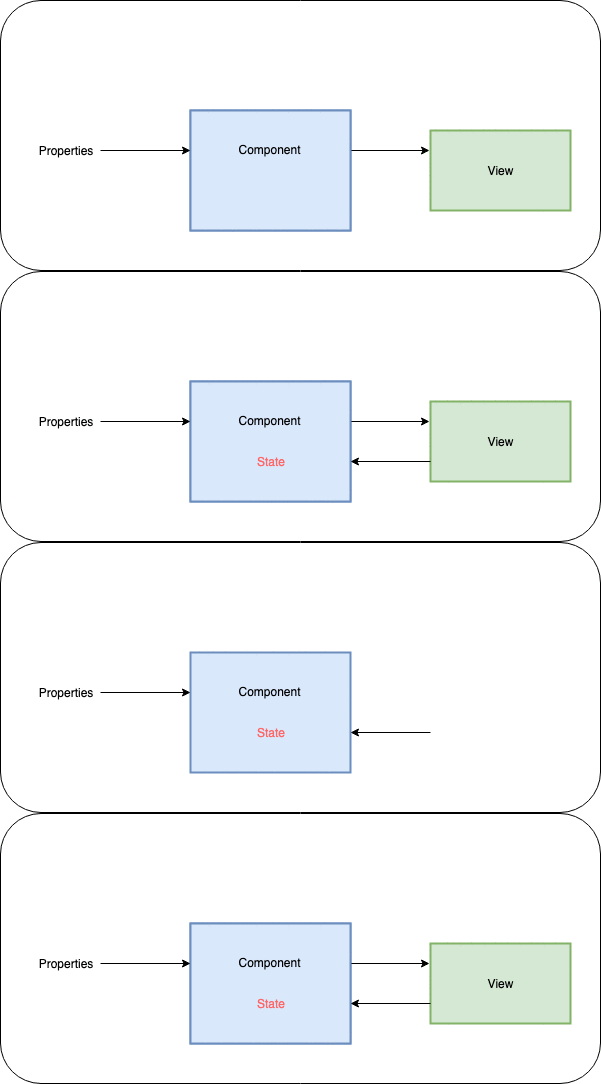
For example, if you want to test the different styles of your “like” button :
describe('like button style', () => {
  it('should set button to notLiked by default', () => {
    const component = shallow(Component, {props: {nbLikes: 1}});

    component.querySelector('button').dispatchEvent('click');

    expect(component.html().querySelector('button').props.class).not.toContain(
      'liked'
    );
  });

  it('should set button to liked when clicking on the button', () => {
    const component = shallow(Component, {props: {nbLikes: 1}});

    component.querySelector('button').dispatchEvent('click');

    expect(component.html().querySelector('button').props.class).toContain(
      'liked'
    );
  });
});
Component, event output
Important: React being the only rendering library currently supported, these features are not implemented yet as they're not needed in react
Because components sometimes need to talk with parent components, frameworks usually use an event based system to setup an upward communication channel between components and their parents.
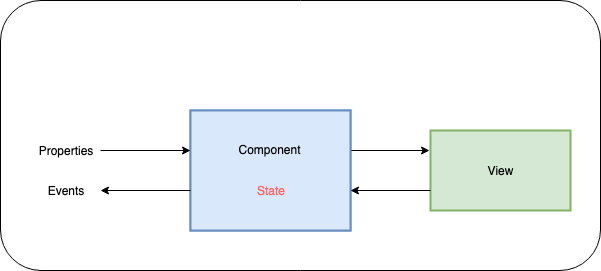
To ensure your component emit the right event, you can attach spies to components and test if they have been called.
describe('like button - onLike event', () => {
  it('should emit onClick Event', () => {
    const spy = createSpy();
    // const spy = jest.fn(); using jest
    const component = shallow(Component, {events: {onLike}});

    component.querySelector('button').dispatchEvent('click');

    expect(spy).toHaveBeenCalled();
  });
});
Component with externals
Important: React being the only rendering library currently supported, these features are not implemented yet as they're not needed in react
For example, Angular component can inject services in the constructor of the components.
To inject services, mixins, etc, an external key to the shallow configuration object is available. The content of externals object is specific to the framework you are testing. It gives you the opportunity to provide some non-standardized data to a component.
This part is the only framework specific thing you will have to learn for testing with component-test-utils !
An example :
describe('user component', () => {
  it('should display the user retrieves from the service', () => {
    const component = shallow(Component, {
      externals: {
        userService: {
          getUser: () => Promise.resolve({name: 'component-test-utils'})
        }
      }
    });

    expect(component).toContain('component-test-utils');
  });
});
Mocking strategies
Components doesn't only generate HTML element, they can have sub-components in their view. For this kind of "parent" component, here is the main question developers should ask themselves: "should I mock this child component ?".
In this case, Component-test-utils provides two ways to create a component in a test environment:
- White list: Every sub-component is mocked, you can give a list a component that won't be mocked and give their mock.
- Black list: No sub-component is mocked, you can specify which component should be mocked.
Given these components:
const postListRender = ({posts}) => `
  <div>
    ${posts.map(postData => `<Post data={postData}/>`)}
    <OtherComponent />
  </div>
`;

const postRender = ({data}) => `
  <article>
    <h1>${data.title}</h1>
    <p>${data.content}</p>
  </article>
`;
White list (default)
const cmp = shallow(postListRender, {
  props: {
    posts: [
      {title: 'post1', content: 'content1'},
      {title: 'post2', content: 'content2'},
    ]
  },
  mocks: {
    OtherComponent: `<div>OtherComponent</div>`
  }
});

cmp.html() === `
  <div>
    <Post />
    <Post />
    <div>OtherComponent</div>
  </div>
`;
Black list
const cmp = shallow(postListRender, {
  props: {
    posts: [
      {title: 'post1', content: 'content1'},
      {title: 'post2', content: 'content2'},
    ]
  },
  mocks: {
    OtherComponent: false
  },
  blackList: true
});

cmp.html() === `
  <div>
    <article>
      <h1>post1</h1>
      <p>content1</p>
    </article>
    <article>
      <h1>post2</h1>
      <p>content2</p>
    </article>
    <OtherComponent />
  </div>
`;
